How to Add Zippers to Bags: A Step-by-Step Guide
Add zippers to bags to make it both secure and stylish. This guide shows you how to upgrade your bag by adding a zipper. You can do this even if it’s an old bag or a new one you’re making. We’ll help you with everything from choosing the right zipper placement to sewing it in perfectly. This way, you can improve your bag customization skills easily.
Key Takeaways
- Upgrading bags with zippers can improve functionality and security
- This guide covers the complete process of sewing zippers on bags
- Learn essential techniques for bag modification and repair
- Discover pro tips to enhance your bag customization skills
- Transform ordinary bags into secure and stylish zipper pouches
Introduction: How to Add Zippers to Bags
Adding a zipper makes your bag more useful and secure. It stops things from falling out. Zippers also make bags look better and help you organize your stuff better. By adding zippers, you make your bags not just trendy but also better for your needs.
Importance of Adding Zippers to Bags
Do you want to make your tote better? Or start a new project with a ziplock bag? Or maybe just fix an old zipper? This guide will show you how. Zippers help keep your stuff safe and easy to get to. They make bags more reliable and organized.
Benefits of Customizing Bags
Customizing can really show off your style. You can add special touches with bag accessory crafts and zipper bag tutorials. And even learn how to replace zippers. This turns regular bags into stylish, safe, and really useful zipper pouches for you.
Materials Needed
To add a zipper to your bag, you’ll need the right materials. First, pick the right zipper. You can choose from different types like standard separating, invisible zippers, or decorative ones. The zipper should be a bit shorter than the bag’s opening.
Types of Zippers
There are different types of zippers to consider. Standard separating zippers are easy to use. Invisible zippers are hidden, giving your bag a neat look. And if you want to add some style, there are decorative zippers available in various colors and designs.
Bag Fabric and Interfacing
Besides the zipper, you’ll need your bag fabric and interfacing. This helps the bag keep its shape. The interfacing can be fusible, which is ironed on, or sew-in that you stitch. Picking the best bag fabric and interfacing helps the zipper stay strong for a long time.
Additional Sewing Supplies
Remember to grab some sewing supplies too. You’ll need pins, scissors, a zipper foot, and thread that matches your bag. These items make adding the zipper to your bag easier and more precise.
Preparing the Bag
First, you need to get the area ready where you’ll put the zipper. This has two main steps. You must measure the bag’s opening and remove any stitching in the way.
Measuring the Bag Opening
Start by measuring the area where the zipper will go. This is key. It helps you find the right zipper length. Getting this step right means the zipper will fit well and close your bag perfectly.
Unpicking Existing Seams
For a bag that’s already made, take out the old seams at the top. This step makes space for the new zipper. Be very gentle so you don’t harm the fabric. By pulling out the old seams, you clear the way for the new zipper nicely.
Cutting and Marking the Zipper
First, measure the bag’s opening. Then, pick a zipper a bit shorter than this length. This way, the zipper won’t be too tight and will close smoothly.
Determining the Zipper Length
Measure the bag’s opening for the zipper. Choose a zipper 1-2 inches shorter than this. It lets you attach the zipper without the material bunching up.
Marking the Zipper Placement
Now, mark where the zipper goes on your bag. Use either a fabric marker or chalk to make a line at the top. This line marks where you’ll sew the zipper, helping you do it right.
Adding Zippers to Bags
First, get your bag ready and cut your zipper to the right size. Now, let’s start adding the zipper to the bag’s opening. Sew one side of the zipper to the bag. Make sure the raw edges line up. Use a zipper foot for a neat stitch. Also, when aligning and pinning the zipper, it should be centered and spaced right.
After sewing one side, turn the bag over. Next, pin the other side of the zipper to the opening’s opposite edge. Sew the second zipper side. Use the zipper foot again for a pro look. It’s important to take your time and check your work. This makes sure the zipper works smoothly.
Finishing Touches
Once the zipper is sewn on, making the edges neat is key. You fold the bag’s top edge down. This covers the rough edges and the zipper’s tape. Then, sew close to the zipper, about 1/8 to 1/4 inch from the edge. By doing this, your project looks clean and professional.
You can also topstitch and reinforce around the zipper. This adds strength and looks nice. It stops the zipper from getting loose as you use the bag more.

Tips and Tricks
As you get better at adding zippers to bags, you might see different types of bags. You could also face some issues. Knowing how to handle these can lead to better results. These challenges can be overcome with the right strategies.
Working with Different Bag Styles
Each bag type, like totes, messenger bags, or purses, needs a unique touch. Some bags have features like boxed corners. These might make you tweak your zipper techniques. Learning to adjust your methods will help the zipper fit well. It also keeps the bag looking great.
Troubleshooting Common Issues
Getting the zipper right can sometimes be hard. Problems may include the fabric bunching up, the zipper looking uneven, or sewing through thick material. To fix these, change your sewing speed. A teflon or a roller foot could be useful too. Always make sure you pin and place the zipper correctly. If your fabric is thick, using fusible interfacing under it can help. Or, try sewing with a heavier-duty needle.
Addressing these issues head-on will lead to smoother sewing. You’ll end up with well-done zippers on your bags.
Bag Zipper Replacement
Sometimes, a bag’s zipper needs to be replaced. It may be old, broken, or not what you want. To do this, you first carefully take out the old zipper. Then, you put in a new one.
Removing Old Zippers
At first, undo the stitches holding the old zipper. Be gentle to avoid tearing the bag. You must pick at the stitches carefully to keep the bag safe.
Installing New Zippers
After the old zipper is off, measure the spot and get a new one of the right size. To attach it, use basic steps like drawing a line, pinning, and sewing. Doing this can make your bag look and work like new again.
Learning to remove old zippers from bags and install new zippers on bags is great. It means you can fix up your bags whenever needed. This makes your favorite bags last longer and stay stylish.

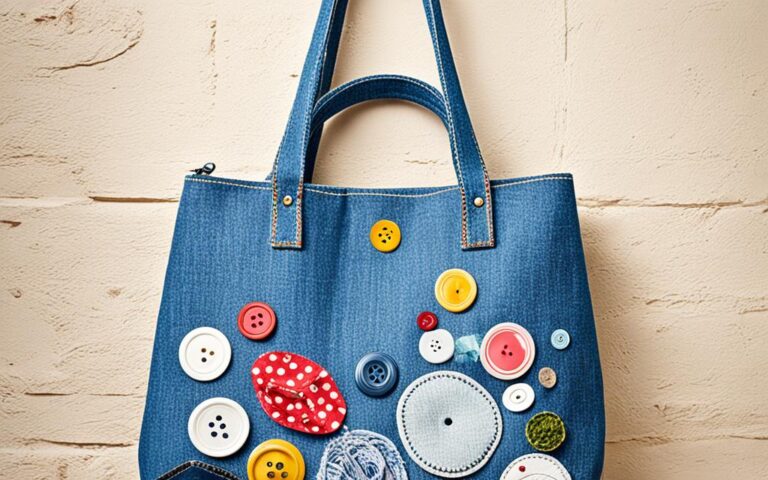
DIY Zipper Bag Projects
Want to make your own custom zipper bags? We have some great DIY projects for you. You can begin by making a DIY tote bag with zipper. Adding a zipper will make it more secure and useful. You can use this tote for shopping, going to the gym, or when traveling.
Tote Bag with Zipper
Looking for a smaller project? Try a DIY zippered cosmetic bag or pouch. These little bags help keep your beauty items organized. You’ve learned to add zippers. Now, you can adapt it to make various bags to match your style and needs.
Bag Accessory Crafts
Adding zippers to bags is just the start. You can also take on some fun crafts that use zippers. Show off your creativity and sewing with diy zipper pouches and wallets. These can hold your small stuff, cash, and cards. You get to make your daily carry special.
Zipper Pouches and Wallets
Zipper pouches and wallets let you be creative. You can make them fit your style and need. You might want an everyday organizer or something to show off. They offer many designs with different zippers, shapes, and colors.
Customizing Bag Straps and Handles
Don’t just stop at zippers on bags. Go further by customizing bag straps and handles with zippers. Add zippers to straps, handles, or hardware to change how your bag looks and works. A zippable strap can change your bag’s style. Or a zipper detail can make your totes and purses stand out.
Making diy zipper pouches and wallets and customizing bag straps and handles with zippers lets you be creative. Make accessories that show who you are and what you like.
Conclusion
We’ve shown you how to add zippers to bags step by step. These skills help you improve bag modification and bag customization. You could be upgrading a tote, making a zippered bag, or fixing an old zipper. The techniques learned can be used in many bag projects.
Picking the right zipper and placing it correctly are key. Then, sewing it carefully is vital for a great outcome. Practice will help you make any bag safe, cool, and useful. It will show off your personal touch. Enjoy sewing!
Source Links
- https://so-sew-easy.com/sew-a-recessed-zipper-on-a-bag/
- https://fabricninja.com/how-to-add-a-zippered-pocket-to-anything-sewing-tutorial-purse-tote-bag-pouch-lining-coat-and-more/
- https://blog.megannielsen.com/2021/02/how-to-add-a-zip-to-a-tote-bag/
- Easy Lined Zippered Pouch Tutorial – Easy Things to Sew