How to Make Bath Bombs: Create Your Own Fizzy Spa Experience
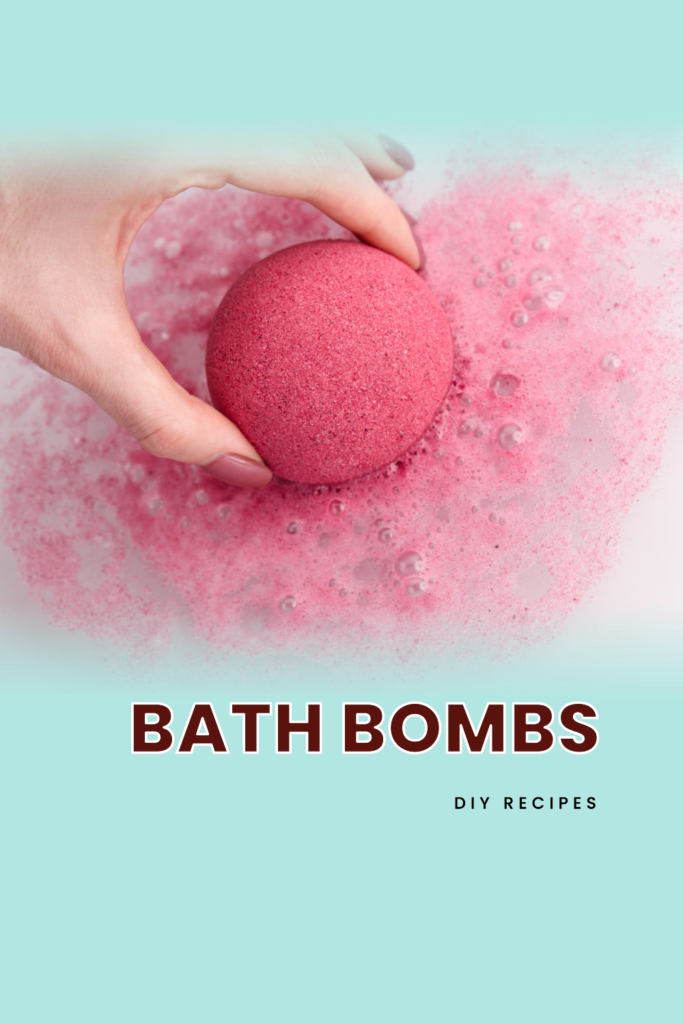
Imagine sinking into a warm, fragrant bath as a fizzy bath bomb bubbles away, releasing soothing scents and colors—pure bliss, right? Bath bombs have become all the rage for a reason—they turn an ordinary bath into a luxurious spa experience. But did you know you can easily make these delightful treats yourself at home? Whether you’re a DIY enthusiast or just curious about how to make bath bombs, we’re here to guide you through the process. You’ll discover how simple ingredients can create relaxing, customized bath bombs that will elevate your self-care routine. Get ready for some serious pampering!
What Are Bath Bombs?
Bath bombs are colorful, delightful additions to your bath that turn an ordinary soak into a luxurious spa experience. When dropped into your tub, they fizz away, releasing pleasant aromas, essential oils, and sometimes vibrant colors into the water.
The Science Behind Bath Bombs
So, what’s happening when these pretty little balls of joy hit the water? It all boils down to a simple chemical reaction. Bath bombs are mainly made of baking soda (sodium bicarbonate) and citric acid. When you add water, these two ingredients react to create carbon dioxide bubbles – that’s the fizzing action you see.
Ingredients typically found in bath bombs:
- Baking Soda: This is the key ingredient for the fizzy reaction.
- Citric Acid: Reacts with baking soda when it meets water.
- Epsom salts: Often added to soothe muscles.
- Essential Oils: For fragrance and aromatherapy benefits.
- Dyes: For that pop of color.
- Cornstarch: Helps to slow down the reaction to make the fizz last longer.
The Reaction Process
When you drop a bath bomb in the water:
- The baking soda and citric acid begin to dissolve.
- They react together to produce carbon dioxide.
- This gas forms bubbles, which create the fizzing effect.
- At the same time, any added ingredients such as scents and colors are released into the water.
You can learn more about the components and how they interact here.
By crafting your own bath bombs, you’re not just making a luxury product; you’re conducting a mini chemistry experiment. It’s fun and educational!
 Photo by Marta Dzedyshko
If you’re curious about how to make bath bombs at home, check out this detailed guide that dives into the specifics of creating your own fragrant and fizzy delights.
Benefits of Using Bath Bombs
Bath bombs aren’t just for fun; they offer a bunch of benefits for both your mind and body. When you toss one into your tub, you get a mix of relaxation, skin nourishment, and aromatherapy. Let’s dive into some of the most amazing ways bath bombs can pamper you.
Relaxation and Stress Relief
 Photo by Marta Dzedyshko
Ever felt overwhelmed and just needed to relax? Bath bombs can be your magic ticket. They often contain essential oils like lavender, chamomile, or eucalyptus. These oils help calm your mind and reduce anxiety. When you mix these oils with warm water, it’s like wrapping yourself in a cozy blanket. It’s no wonder we love them so much!
Bath bombs can turn your tub into a spa. It’s all about aromatherapy. The scents from the oils lift your mood and ease your stress. You can almost feel the tension melting away. So next time you’re stressed, try using a bath bomb with soothing essential oils.
Skin Benefits
Bath bombs are also superheroes for your skin. Many bombs are packed with ingredients like Epsom salts, coconut oil, and shea butter. These can do wonders for your skin, making it soft and smooth. Epsom salts are great for detoxing your skin. They help remove dead skin cells and leave you with a nice glow.
Here are some ways these ingredients help your skin:
- Moisturizing: Oils like coconut and shea butter deeply hydrate your skin.
- Softening: Baking soda in bath bombs can make your skin feel silky smooth.
- Nourishing: Other ingredients like vitamins and minerals feed your skin, keeping it healthy.
Feel free to experiment with different bath bombs to see which ones work best for you. With so many options, you can easily find something that caters to your skin type.
For more info on how to make bath bombs at home, check out this guide for a fun DIY project.
Essential Ingredients for Bath Bombs
Creating bath bombs at home can be a fun and relaxing activity. Knowing the essential ingredients will help you get started on making your personalized fizzy spa experience. Let’s dive into what you’ll need.
Basic Ingredients List
To understand how to make bath bombs, you need to start with the core ingredients. These components are essential for both the structure and the fizzing reaction that makes bath bombs so delightful.
- Baking Soda: This is the primary component. It reacts with the citric acid to create the fizzing effect.
- Citric Acid: This is another crucial ingredient for the fizz. Without citric acid, your bath bomb won’t fizz in water.
- Cornstarch: This helps to hold the bath bomb together and slow down the reaction between baking soda and citric acid, ensuring a longer-lasting fizz.
- Epsom Salt: This adds to the soothing effect of the bath bomb. Epsom salt is well known for relieving muscle tension.
- Essential Oils: These add fragrance and therapeutic benefits to your bath. Popular choices include lavender, eucalyptus, and peppermint.
By combining these ingredients, you can make a basic bath bomb that fizzes and relaxes your muscles.
You can check a simple guide to get started here.
Optional Add-ins
Once you have the basic ingredients, you can get creative with optional add-ins to make your bath bombs even more special.
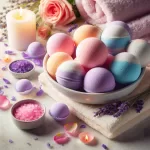
- Colorants: Use natural colorants or food-safe dyes to make your bath bombs visually appealing.
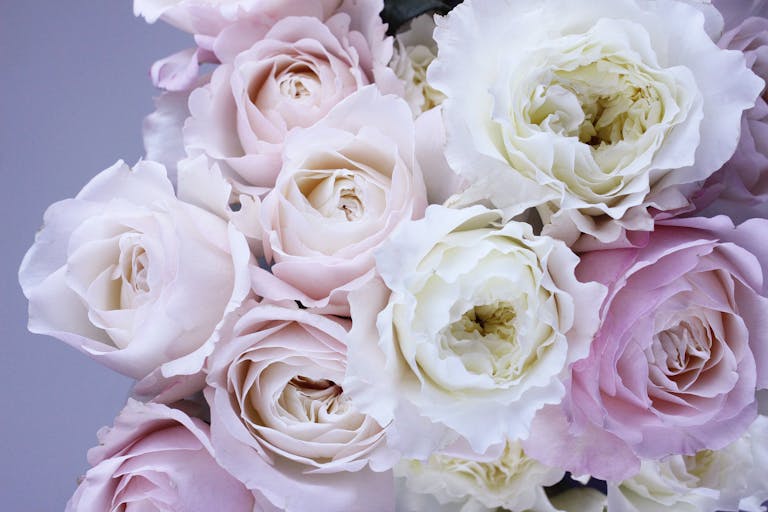
- Dried Flowers: Adding dried flowers like lavender, rose petals, or chamomile can give a lovely touch and additional benefits to the bath experience.
- Fragrances: Besides essential oils, you could add fragrances to customize the scent further. Make sure they are skin-safe.
- Glitter: Cosmetic-grade glitter can create a magical, sparkling bath experience.
- Carrier Oils: Almond oil, coconut oil, or jojoba oil can be added for extra moisturizing properties.
By adding these extras, you can tailor your bath bombs to your personal preferences or gift them as thoughtful, homemade presents. Check out an inspiring guide here for more ideas on optional add-ins.
 Photo by Marta Dzedyshko
Making bath bombs is all about the fun of experimenting with different ingredients and finding what works best for you. Why not give it a try?
How to Make Bath Bombs at Home
Creating your own bath bombs at home is not only fun but also a great way to add a personal touch to your relaxation ritual. With just a few ingredients, you can whip up a batch that looks and smells fantastic! Here’s everything you need to know to get started.
 Photo by Marta Dzedyshko
Step-by-Step Instructions
Let’s break down the process into easy-to-follow steps. Don’t worry, it’s simpler than it seems!
- Gather Your Ingredients
- Baking Soda (1 cup)
- Citric Acid (1/2 cup)
- Cornstarch (1/2 cup)
- Epsom Salt (1/2 cup)
- Water (1-2 teaspoons)
- Essential Oils (10-15 drops, your choice of scent)
- Food Coloring (optional)
- Carrier Oil (such as coconut, 2.5 tablespoons)
- Mix the Dry Ingredients In a large bowl, combine the baking soda, citric acid, cornstarch, and Epsom salt. Stir until they are well-blended.
- Add the Wet Ingredients
- In a separate bowl, mix the water, essential oils, and a few drops of food coloring if using.
- Slowly add the wet mixture to the dry ingredients. Do this gradually to prevent the mixture from fizzing prematurely. You can use a spray bottle for more control.
- Blend Until Clumpy The mixture should start to clump together but not be too wet. Think of the texture of wet sand – it should hold its shape when pressed but not be sopping wet.
- Mold the Bath Bombs
- Press the mixture firmly into your molds. Silicone molds work great, or you can use plastic ornament molds for a classic bath bomb shape.
- Pack the mixture tightly to ensure the bath bombs hold together.
- Dry the Bath Bombs
- Let them sit in the molds for at least 24 hours.
- After they have hardened, gently remove them from the molds.
- Allow them to dry completely on a baking sheet for another day if needed.
For a detailed bath bomb recipe, check out this Homemade Bath Bombs guide by A Beautiful Mess.
Tips for Perfect Bath Bombs
Want to make sure they come out just right every time? Follow these tips:
- Measure Accurately: Consistency is key. Use precise measurements for the best results.
- Avoid Humidity: Work in a dry environment. Moisture in the air can cause the bath bombs to fizz too soon.
- Patience in Drying: Let them dry thoroughly to ensure they don’t crumble. Rushing this step can ruin the final product.
- Practice Makes Perfect: Your first batch may not be perfect, but keep trying! Experiment with different scents and colors until you find your perfect combo.
To explore more about making bath bombs at home, read this DIY Bath Bomb Recipe For Maximum Benefits & Fizz.
By following these steps and tips, you’ll be well on your way to creating the ultimate fizzy spa experience right in your bathtub!
Creative Variations of Bath Bombs
Bath bombs are a delightful way to add a little luxury and fun to your bath routine. Making your own bath bombs allows you to customize them in endless ways, from vibrant colors to irresistible scents. The possibilities are only limited by your imagination! Let’s explore some creative variations you can try at home.
Scented and Colored Bath Bombs
Incorporating various scents and colors into your bath bombs is easier than you might think. You can use essential oils for fragrances and natural coloring agents or mica powders to add bursts of color.
 Photo by Victoria Emerson
Here’s how you can do it:
- Essential Oils for Scents:
- Lavender for relaxation
- Peppermint for a refreshing boost
- Eucalyptus to clear the sinuses
- Citrus blends like lemon or orange for a zesty wake-up
- Natural Colorants and Mica Powders:
- Mica powders come in every color imaginable and give your bath bombs a magical shimmer.
- Beetroot powder for a natural pink hue.
- Spirulina for a gentle green shade.
- Activated charcoal for a dramatic black bath bomb.
Check out this tutorial on how to make bath bombs for more inspiration.
Seasonal Bath Bomb Ideas
Making bath bombs with a seasonal twist can make bath time even more special. Here are a few ideas to get you started:
- Winter Holidays:
- Peppermint Candy Cane: Use red and white mica powders and peppermint oil.
- Gingerbread Spice: Combine cinnamon, nutmeg, and clove essential oils for a warm and festive scent.
- Evergreen Forest: Blend fir and pine essential oils with green colorants.
- Spring and Summer:
- Floral Delight: Use dried flower petals like rose or lavender, and floral essential oils such as Ylang-Ylang or Jasmine.
- Citrus Splash: Bright yellow and orange bath bombs scented with lemon or grapefruit essential oil can uplift your mood.
- Tropical Paradise: Combine coconut oil, shredded coconut, and pineapple or mango fragrance oils for a tropical escape.
- Autumn:
- Pumpkin Spice: Infuse with pumpkin spice fragrance oil and a little orange color.
- Apple Cinnamon: Use apple fragrance oil with a touch of cinnamon bark oil.
Experimenting with seasonal themes makes your bath time festive and fun year-round!
Dive into these creative bath bomb ideas for more variations and inspiration.
Embrace your creativity and enjoy the process of making bath bombs that reflect your personal style and preferences. With an endless array of colors, scents, and themes, you can transform every bath into a unique spa experience!
Storing and Using Bath Bombs
So, you’ve mastered the art of making bath bombs, those little balls of fizzy joy. Now, let’s talk about keeping them fresh and making sure you get the most out of them during bath time!
Storage Tips: Explain how to store bath bombs to ensure they maintain their fizz
When it comes to ensuring that your homemade bath bombs stay as fizzy as the day you made them, proper storage is crucial. Bath bombs can lose their effervescence if they’re not stored correctly, making your relaxing spa experience less exciting.
Photo by Marta Dzedyshko
Here are some essential tips to keep your bath bombs in top-notch condition:
- Keep Them Dry: Moisture is the enemy of bath bombs. Store them in a dry place away from any water sources. Consider using an airtight container to protect them from humidity.
- Avoid Direct Sunlight: Sunlight can cause bath bombs to fade and lose their effectiveness. Find a cool, dark place to store them, like a cabinet or drawer.
- Use a Desiccant: Desiccants are moisture-absorbing substances. Throwing a pack of silica gel into the storage container can help keep the bath bombs dry.
- Separate Fragrances: If you’ve made bath bombs with different scents, it’s best to store them separately to prevent the scents from blending.
You might want to check out Scentennials’ guide on storing bath bombs for even more tips!
By keeping these storage tips in mind, you can ensure that your bath bombs will be as delightful and fizzy as the day you crafted them.
Conclusion
Making bath bombs at home is not only fun but also rewarding. Imagine creating your own fizzy spa experience tailored to your favorite scents and colors. When you know how to make bath bombs, you’re not just crafting a product—you’re forming a relaxing ritual.
Homemade bath bombs are a great way to treat yourself after a long day. They are budget-friendly, natural, and can be customized to suit your skin’s needs. Plus, they make a gazillion beautifully handmade gifts for friends and family.
Give it a try! Dive into the recipes shared and start making your own bath bombs today. Thank the universe for this little luxury we can create on our own!
Fizzy Relaxation Bath Bombs
Equipment
- 1 Large mixing bowl
- 1 Whisk
- 1 Small spray bottle
- Bath bomb molds or muffin tin
- Measuring cups and spoons
Materials
- 1 cup baking soda
- 1/2 cup citric acid
- 1/2 cup Epsom salt
- 1/2 cup cornstarch
- 3/4 teaspoon water
- 2 teaspoons essential oil lavender, eucalyptus, or your preferred scent
- 2 teaspoons coconut oil melted
- Food coloring optional
Instructions
- In a large bowl, whisk together the dry ingredients: baking soda, citric acid, Epsom salt, and cornstarch.
- In a small spray bottle, combine the water, essential oil, and melted coconut oil. If using food coloring, add a few drops here.
- Slowly spray the liquid mixture into the dry ingredients, whisking constantly. Be careful not to add too much at once, as this can start the fizzing reaction.
- Continue mixing until the mixture resembles slightly damp sand. It should hold together when squeezed.
- Quickly press the mixture into your molds, packing it tightly.
- Let the bath bombs dry for at least 24 hours before removing from the molds.
- Once fully dry, carefully remove from the molds and store in an airtight container.
Estimated Cost:
- $10-$15 USD, depending on the quality of ingredients and if you already have some on hand.
Storage:
- Store in an airtight container in a cool, dry place. Use within 3-6 months for best results.
Video
Notes
FAQ: How to Make Bath Bombs
What ingredients do I need to make bath bombs?
You’ll need baking soda, citric acid, corn starch, epsom salt, essential oils, plant oils, and witch hazel.
Can I make bath bombs without citric acid?
Yes, but citric acid is what causes the fizz. Alternatives like cream of tartar can work but might not be as effective.
Do I need special molds for bath bombs?
Nope! You can use muffin tins, silicone molds, or even plastic ornaments.
Why do my bath bombs keep crumbling?
They might be too dry. Try adding a bit more witch hazel or plant oil until the mixture holds together when squeezed.
How long do bath bombs need to dry?
Usually, 24 hours is enough. Make sure they’re stored in a dry place.
Can I use food coloring for bath bombs?
Yes, but liquid food coloring can affect the texture. Powdered dyes or mica powders are better.
What’s the best way to store bath bombs?
Keep them in an airtight container, away from moisture and sunlight.
My bath bombs aren’t fizzing much. What’s wrong?
Check your ingredient ratios. A common mix is 2 parts baking soda to 1 part citric acid. Also ensure they are fresh.
Can I add dried flowers or herbs to my bath bombs?
Absolutely! Just be aware that they might float in your bath water.
How do I avoid stains in the tub?
Use non-staining colorants and make sure to clean the tub right after your bath.