Essential Tips for Storing Homemade Toner Properly
Have you ever made your own homemade toner? There’s something incredibly satisfying about creating your own skincare products, knowing exactly what ingredients go into them. But what happens after you’ve made that perfect batch of toner? How do you ensure it stays fresh and effective?
Today, we’re going to share some essential tips for storing homemade toner properly so that you can enjoy the benefits for longer. Whether you’re a seasoned DIY enthusiast or new to the world of homemade skincare, these tips will help you preserve the freshness and efficacy of your DIY toner.
Whether you make toner for yourself or to share with friends and family, these storage tips will ensure that your homemade toner remains potent and effective. Let’s dive in!
Key Takeaways:
- Proper storage is essential for maintaining the freshness and efficacy of homemade toners.
- Use clean and sterilized jars or containers to store your toner.
- Consider using distilled or boiled water to eliminate possible contaminants.
- Adding antioxidants or alcohol extracts can help preserve and inhibit bacterial growth in toners.
- Store toners in opaque bottles or jars and away from direct light and temperature fluctuations.
Importance Tips for Storing Homemade Toner
When it comes to storing homemade toner, cleanliness is of utmost importance. Proper storage techniques can help preserve the freshness and effectiveness of your DIY concoctions. Follow these homemade toner storage recommendations to ensure your toners stay in their best condition:
- Use clean and sterilized jars or containers: Opt for glass or plastic containers that are specifically designed for storing skincare products. Make sure to clean them thoroughly before use.
- Wash reused containers with soap and hot water: If you’re reusing containers, it’s essential to wash them with soap and hot water to remove any residue or potential contaminants.
- Consider separate equipment for making toners: To avoid cross-contamination, it’s advisable to use separate equipment, such as bowls and stirring utensils, dedicated solely to making toners.
- Keep your hands clean: Before handling the toner or its storage containers, ensure your hands are clean. This helps prevent the introduction of bacteria or other impurities into the toner.
- Close container lids tightly: To protect the toner from light and oxygen, make sure to close the lids tightly. Exposure to light and air can accelerate the breakdown of the toner’s ingredients.
By maintaining cleanliness and following proper storage techniques, you can prolong the shelf life of your homemade toners and continue enjoying their benefits over time.
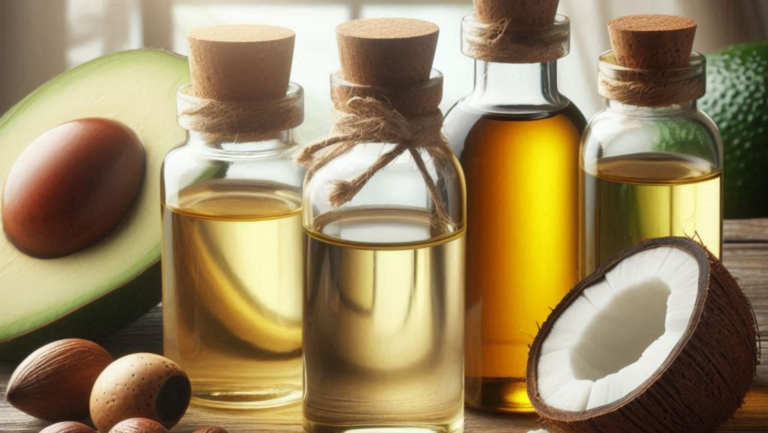
Using Distilled or Boiled Water for Homemade Toner
Water-based homemade toners can have a shorter shelf life due to the presence of water, which can breed bacteria. To extend the shelf life of your homemade toner and preserve it effectively, consider using distilled or boiled water in your toner recipes. Using distilled or boiled water helps eliminate possible contaminants, keeping your toner fresher for longer.
Additionally, storing certain ingredients like hydrosols, witch hazel, and aloe Vera gel in the fridge can further enhance their freshness and effectiveness. Refrigeration helps in maintaining the quality of these ingredients and prevents spoilage. By implementing these practices, you can maximize the shelf life of your homemade toner, ensuring its potency and efficacy over time.
Preserving homemade toner effectively requires attention to detail and the use of quality ingredients. By using distilled or boiled water and refrigerating specific ingredients, you can extend the shelf life of your toner, avoiding bacterial growth and ensuring its longevity.
Adding Antioxidants for Toner Stability

When it comes to homemade toner preservation, adding antioxidants can be a game-changer. While not considered actual preservatives, antioxidants play a crucial role in slowing down oxidation, which can compromise the oils or other ingredients in your toner.
By incorporating natural stabilizers like vitamin E oil and rosemary antioxidant oil, you can effectively preserve the integrity of your homemade toner.
These antioxidants work best when added after the oil base has been mixed with melted waxes and butters. Their presence helps protect the toner from the damaging effects of oxidation, keeping it fresh and effective for longer periods. Moreover, these natural additives provide additional benefits for your skin, such as nourishment and rejuvenation.
“Adding antioxidants to my homemade toner has been a game-changer. Not only does it prolong the shelf life, but it also enhances the overall effectiveness, leaving my skin feeling refreshed and renewed.” – Samantha, DIY Skincare Enthusiast
If you’re wondering which antioxidants to incorporate into your toner, here are a few options:
- Vitamin E oil: This antioxidant not only extends the shelf life of your toner but also helps protect your skin from environmental stressors and free radicals.
- Rosemary antioxidant oil: Known for its potent antioxidant properties, rosemary oil helps prevent oxidation, improving the stability and efficacy of your homemade toner.
By infusing your toner with these natural antioxidants, you can enhance its preservation and optimize its performance for a longer period. Not only will your skin reap the benefits, but you’ll also enjoy the satisfaction of using homemade skincare products that retain their freshness and effectiveness.
Incorporating Antioxidants: Recipe Example
Here’s an example recipe that demonstrates how to incorporate antioxidants into your homemade toner:
| Ingredients | Measurements |
|---|---|
| Witch hazel | 1/2 cup |
| Aloe vera gel | 1/4 cup |
| Vitamin E oil | 1 teaspoon |
| Rosemary antioxidant oil | 10 drops |
In a sterilized bottle, combine the witch hazel and aloe vera gel. Mix well until they are fully incorporated. Then, add the vitamin E oil and rosemary antioxidant oil to the mixture. Gently shake the bottle to ensure all the ingredients are blended thoroughly.
Your antioxidant-infused toner is now ready to use. Remember to store it in a cool, dry place away from direct sunlight to maintain its freshness and effectiveness.
Using Alcohol as a Preservative
Alcohol can be a valuable ingredient when it comes to preserving homemade toner effectively and safely. It has antimicrobial properties that help inhibit the growth of bacteria and other microorganisms, ensuring the longevity of your toner.
By adding alcohol extracts or tinctures to your toner formulation, you not only contribute to its preservation but also introduce beneficial botanical goodness. However, it’s essential to note that alcohol may not mix well with all fats, so it’s best limited to water-based toner formulas.
Using alcohol as a preservative in your homemade toner gives you peace of mind, knowing that you’re taking the necessary steps to maintain its freshness and efficacy.
Benefits of Alcohol as a Preservative:
- Acts as an antimicrobial agent
- Inhibits the growth of bacteria and microorganisms
- Extends the shelf life of homemade toner
- Ensures the cleanliness and safety of your toner
Adding alcohol to your toner not only helps with preservation but also gives you the peace of mind that your homemade toner is safely and effectively preserved.
Important Considerations:
When using alcohol as a preservative in your toner, keep the following in mind:
- Choose the appropriate concentration of alcohol for your toner formula
- Ensure that the alcohol is well incorporated into the toner mixture
- Refrain from using alcohol in oil-based toner recipes
- Take caution when using toners with alcohol on sensitive or dry skin
By following these considerations, you can safely preserve your homemade toner and enjoy its benefits for an extended period.
Expert Tip:
Always conduct a patch test before using toners containing alcohol, especially if you have sensitive or dry skin. This will help you determine whether the toner is suitable for your skin type.
DIY Alcohol-Based Toner Recipe:
| Ingredients | Amount |
|---|---|
| Distilled water | 1 cup |
| Witch hazel | 1/4 cup |
| Alcohol of your choice (e.g., vodka or rubbing alcohol) | 1/4 cup |
| Essential oils (optional) | A few drops |
Combine all the ingredients in a clean glass bottle or jar. Shake well to ensure proper mixing. Apply the toner to your skin using a cotton pad or by gently patting it into your face. Store the toner in a cool, dark place to preserve its effectiveness.
Remember, using alcohol as a preservative in your homemade toner can help preserve it effectively and safely, ensuring that it remains fresh and potent for long-lasting skincare benefits.
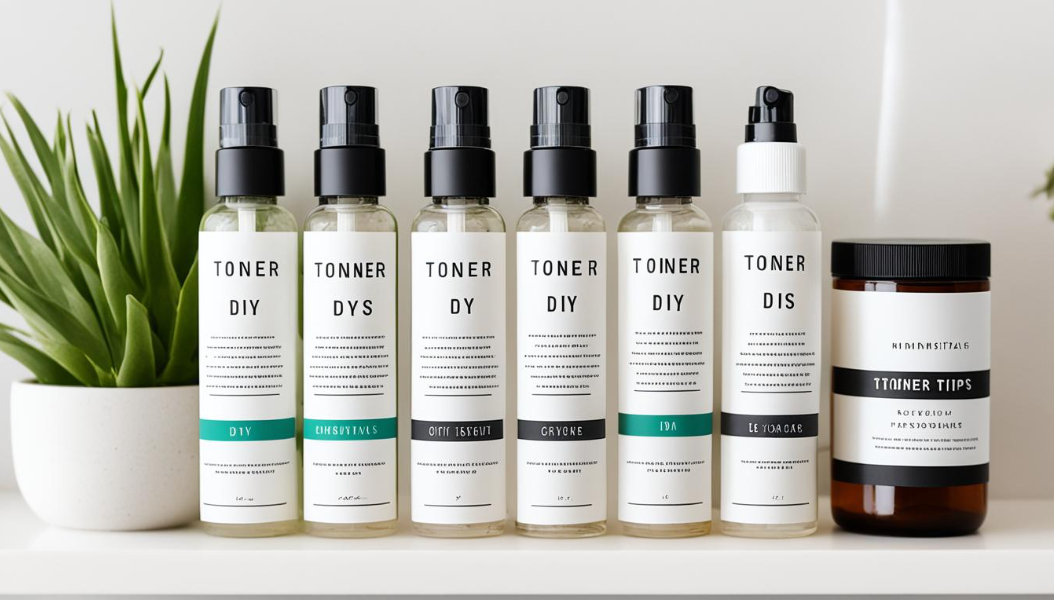
Proper Storage Techniques for Homemade Toner

Proper storage is essential for maintaining the freshness and effectiveness of homemade toners. By following these DIY toner storage tips, you can extend the shelf life of your homemade toner and ensure its optimal performance.
Protect from Light
Store your toners in cobalt or amber bottles or jars to shield them from strong light. Sunlight and artificial light can cause the toner’s ingredients to degrade faster, reducing their effectiveness. By using dark-colored containers, you can help preserve the potency of your toner.
Away from Temperature Fluctuations
Avoid storing your toners in areas prone to temperature changes, such as near windows or heating vents. Fluctuations in temperature can negatively impact the toner’s consistency and efficacy. Instead, choose a cool, dry place that maintains a relatively stable temperature throughout the day.
Prevent Melting in Warmer Months
In warmer months, certain toners like salves and lip balms may be more susceptible to melting. To prevent this, keep them in cool areas, such as the refrigerator. This extra measure ensures that your toner stays solid and retains its intended texture and properties.
By following these tips, you can effectively store your homemade toners and extend their shelf life, allowing you to enjoy their benefits for longer periods.
Water-based Creations and Shelf Life
When it comes to homemade toners, it’s important to understand that water-based formulations generally have a shorter shelf life compared to oil- or butter-based ones. The presence of water in these toners can create an environment where bacteria can thrive, leading to potential spoilage and reduced effectiveness. To extend the shelf life of your water-based toners and ensure their freshness, consider the following best practices for storing toner at home:
- Make Smaller Batches: Instead of preparing large quantities of water-based toner, consider making smaller batches. This allows you to use up the toner within a reasonable time frame and ensures that you always have a fresh supply.
- Use Fresh Ingredients: Optimal efficacy of water-based toners relies on using the freshest ingredients possible. Fresh botanical extracts, hydrosols, and other water-based components can contribute to the overall quality and longevity of your toner.
To help you visualize the differences in shelf life between water-based and oil/butter-based toners, here is a comparison table:
| Toner Type | Shelf Life |
|---|---|
| Water-based toners | Approximately 3-6 months |
| Oil/butter-based toners | Approximately 6-12 months |
By implementing these best practices and understanding the unique characteristics of water-based toners, you can ensure that your homemade toner remains fresh, effective, and safe to use.
Understanding Ingredient Shelf Life

When creating homemade toners, it’s important to understand the shelf life of the ingredients you use. Different oils and butters have varied expiration dates, and being aware of these can help you adjust your recipes accordingly. Additionally, knowing the properties of each ingredient will enable you to create toners that meet your specific needs and expectations.
Here are some key factors to consider:
- Shelf life: Some oils and butters have a longer shelf life than others. It’s essential to use ingredients that are fresh and within their expiration dates to ensure the efficacy of your toner.
- Heat sensitivity: Certain ingredients can withstand high temperatures during the production process, while others may be more delicate. It’s important to adjust the heating and cooling stages accordingly to maintain the benefits of each ingredient.
- Consistency: Ingredients may have different states—solid or liquid—at room temperature or during specific weather conditions. Understanding these variations will help you properly handle and store your toner.
Ingredient Shelf Life Guide
| Ingredient | Shelf Life | Heat Sensitivity | Consistency |
|---|---|---|---|
| Olive Oil | 1-2 years | No | Liquid |
| Coconut Oil | 2-3 years | No | Solid (below 76°F) | Liquid (above 76°F) |
| Shea Butter | 1-2 years | No | Solid |
| Jojoba Oil | 2-3 years | No | Liquid (at room temperature) |
Remember to always check the recommended shelf life for each ingredient and store your toner in a cool, dry place to maintain its freshness. By understanding the properties and expiration dates of your toner ingredients, you can create toners that are both effective and long-lasting.
Limitations of Homemade Toner Shelf Life
When it comes to homemade toners, it’s essential to understand that their shelf life may not be as long as commercially produced products. Unlike store-bought toners that often contain synthetic chemicals as preservatives, homemade toners rely on natural ingredients, which may have a shorter lifespan.
While certain preservation properties can be added to homemade toners, it’s still recommended to use them within a reasonable time frame to ensure their effectiveness. The absence of synthetic preservatives means that bacteria and other microorganisms may start to grow over time, potentially compromising the quality and efficacy of the toner.
To preserve homemade toners effectively and extend their shelf life, it’s best to craft them in small batches. By preparing smaller quantities, you can ensure the use of fresh ingredients and minimize the risk of spoilage. Additionally, sharing your homemade toners with friends and family can help prevent wastage and ensure you’re always using fresh products.
It’s important to note that the shelf life of homemade toners can vary depending on the specific ingredients used. Some natural ingredients like essential oils, hydrosols, and infused waters may have their own expiration dates, which should be considered when creating your toner recipes.
By following proper storage and preservation techniques, such as using clean and sterilized containers, keeping toners in cool and dark places, and adding natural antioxidants like vitamin E oil, you can maximize the shelf life of your homemade toners and continue enjoying their benefits.
| Tips for Extending the Shelf Life of Homemade Toner |
|---|
| 1. Craft toners in small batches to ensure the use of fresh ingredients. |
| 2. Share your homemade toners with friends and family to prevent wastage. |
| 3. Use clean and sterilized jars or containers for storing toners. |
| 4. Store toners in cool, dark places away from direct light and temperature fluctuations. |
| 5. Add natural antioxidants like vitamin E oil to help preserve the toner. |
Benefits of DIY Face Toner with Essential Oils
Creating a DIY face toner with essential oils offers numerous benefits. It allows you to have complete control over the ingredients used, ensuring that your toner is tailored to your specific skin needs and preferences. Essential oils provide various skin-related properties, such as soothing, rejuvenating, and calming effects. They also add delightful fragrances to your skincare routine.
By making your own toner, you can avoid harsh chemicals and synthetic additives that are often found in commercial products. This means you have a natural and organic option that is gentler on your skin.
“I love creating my own face toner with essential oils because it gives me the freedom to customize it according to my skin’s needs. I can choose oils that target specific concerns, such as acne, dryness, or aging. Plus, the aroma of the essential oils adds a spa-like experience to my skincare routine.” – Sarah, DIY Skincare Enthusiast
Another advantage of DIY face toners is that you can experiment with different oils and combinations to find what works best for you. Whether you have oily, dry, sensitive, or combination skin, there are essential oils that can help balance, moisturize, and nourish your skin.
Here are a few examples of popular essential oils and their skin benefits:
- Lavender oil: Known for its calming and soothing properties, lavender oil can help reduce redness and inflammation.
- Tea tree oil: With its antimicrobial properties, tea tree oil can help fight acne-causing bacteria and promote clearer skin.
- Frankincense oil: This oil is known for its rejuvenating and anti-aging properties, making it a popular choice for mature skin.
When using essential oils in your DIY toner, it’s important to dilute them properly to avoid skin irritation. Always do a patch test before applying the toner to your face and monitor your skin’s reaction.
Refreshing DIY Toner Recipe with Essential Oils:
| Ingredients | Benefits |
|---|---|
| 1/2 cup rose water | Soothing and hydrating |
| 1 tablespoon witch hazel | Astringent and toning |
| 5 drops lavender oil | Calming and anti-inflammatory |
| 3 drops tea tree oil | Antimicrobial and acne-fighting |
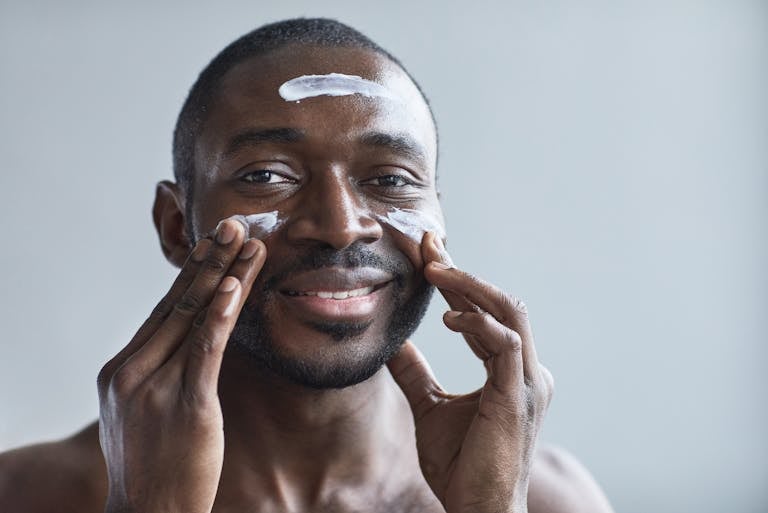
Mix all the ingredients in a sterilized bottle and shake well before each use. Apply the toner to cleansed skin using a cotton pad or by gently patting it into the skin with your fingers. Store the toner in a cool, dark place to extend its shelf life.
With a DIY face toner featuring essential oils, you can elevate your skincare routine while enjoying the benefits of natural and personalized ingredients. So, why not give it a try and experience the wonders of homemade toner?
Base Ingredients for DIY Face Toner with Essential Oils
When it comes to creating a DIY face toner with essential oils, choosing the right base ingredients is key to achieving a customized and effective product. These ingredients not only provide specific benefits to the skin but also contribute to the overall shelf life of your homemade toner.
1. Witch Hazel
Witch hazel acts as a gentle astringent, tightening pores and promoting a smoother complexion. It’s known for its anti-inflammatory properties and can help soothe irritated skin. When used in toners, witch hazel helps remove excess oil and impurities, leaving your skin feeling refreshed and revitalized.
2. Aloe Vera
Aloe vera is a popular ingredient in skincare due to its soothing and hydrating properties. It can help calm inflamed skin, reduce redness, and provide a moisture boost. Incorporating aloe vera into your DIY toner can help balance your skin’s pH levels and keep it looking healthy and radiant.
3. Green Tea
Green tea is rich in antioxidants that provide protection against free radicals and environmental damage. Adding green tea to your toner can help combat signs of aging, reduce inflammation, and promote a more even skin tone. Its antibacterial properties also make it effective in fighting acne-causing bacteria.
4. Apple Cider Vinegar
Apple cider vinegar is a natural ingredient renowned for its multiple benefits to the skin. It acts as a natural exfoliator, helps restore the skin’s pH balance, and assists in reducing the appearance of pores. Apple cider vinegar also has antimicrobial properties that can help prevent breakouts and promote clearer skin.
5. Hydrosols
Hydrosols, such as rose water and lavender water, offer additional skin benefits and pleasant scents. Rose water helps soothe dry and sensitive skin, while lavender water calms and balances oily or acne-prone skin. These hydrosols can be used as a base ingredient or as a refreshing addition to your DIY toner.
By incorporating these base ingredients into your DIY face toner, you can create a personalized skincare product that suits your specific skin needs. Experiment with different combinations and ratios to find the perfect formulation for your skin. Remember to store your homemade toner properly using the tips mentioned earlier to extend its shelf life and maintain its effectiveness.
Conclusion
Properly storing your homemade toner is essential for preserving its freshness and maximizing its effectiveness. By following the tips and recommendations provided throughout this article, you can significantly extend the shelf life of your DIY toner and ensure that it remains potent for longer periods.
Experimenting with different ingredients and essential oils allows you to create personalized toners that cater to your specific skin type and concerns. Whether you’re aiming for soothing, rejuvenating, or calming effects, incorporating essential oils into your toner can provide a range of benefits.
Remember to choose clean and sterilized containers, use distilled or boiled water to minimize contamination risk, and consider adding natural stabilizers or alcohol extracts for preservation. Additionally, store your toners in dark, cool places away from direct light and temperature fluctuations to maintain their quality.
By implementing these tips for storing homemade toner properly, you can ensure that your DIY creations remain fresh, potent, and ready to enhance your skincare routine.
FAQ
How can I store homemade toner properly?
To store homemade toner properly, use clean and sterilized jars or containers. Wash reusable containers thoroughly with soap and hot water. Keep your hands clean when handling the toner, and close container lids tightly to protect from light and oxygen.
What kind of water should I use in homemade toner?
For extended shelf life, use distilled or boiled water in your toner recipes to eliminate possible contaminants. Keeping hydrosols, witch hazel, and aloe Vera gel in the fridge can also help prolong their freshness and effectiveness.
How can I stabilize homemade toner?
Adding antioxidants like vitamin E oil and rosemary antioxidant oil can help slow down oxidation in toners, preserving their integrity. These antioxidants are best added after the oil base has been mixed with melted waxes and butters.
Can alcohol be used as a preservative in homemade toner?
Yes, alcohol can inhibit the growth of bacteria and microorganisms in toners. However, it may not mix well with all fats, so it should be limited to water-based toner formulas.
What are some proper storage techniques for homemade toner?
Store toners in cobalt or amber bottles or jars to protect them from light. Keep toners out of direct light and away from temperature fluctuations. During warmer months, store toners in cool, dry places to prevent melting.
Do water-based toners have a shorter shelf life?
Yes, water-based toners generally have a shorter shelf life because water can breed bacteria. It is recommended to make smaller batches of water-based toners to ensure freshness and optimal efficacy.
How should I store toners with different ingredients?
Different oils and butters used in toner recipes have varied shelf lives. Understanding these shelf lives can help you adjust recipes accordingly. Some ingredients can be heated to high temperatures, while others may have solid and liquid states.
Can homemade toners last as long as commercially produced products?
Homemade toners may not have the same shelf life as commercially produced products due to the absence of synthetic chemicals. It is best to make toners in small batches and use fresh ingredients for optimal effectiveness.
What are the benefits of DIY face toner with essential oils?
DIY face toners with essential oils allow you to customize the ingredients based on your specific skin needs. Essential oils provide various skin-related properties, such as soothing, rejuvenating, and calming effects, while adding delightful fragrances to your skincare routine.
What are some base ingredients for DIY face toner with essential oils?
Witch hazel acts as a gentle astringent, while aloe Vera soothes and hydrates the skin. Green tea provides antioxidant protection, and apple cider vinegar helps balance the skin. Hydrosols like rose water and lavender water offer additional skin benefits and pleasant scents.
Source Links
- https://blog.mountainroseherbs.com/5-tips-preserving-handcrafted-natural-bodycare-products
- https://www.desertnaturals.me/diy-face-toner/
- https://www.wikihow.com/Make-a-Skin-Toner